Category: Photography

  • What the F

    Last January I bought a Nikon F6, the most advanced film SLR camera ever created. Over the past few weeks I have been tracking down a Nikon F, Nikon’s original film SLR, camera on eBay. The F6 has fully electronic control and a self-diagnosing shutter. The F is fully mechanical and is not at all self-aware. I am obsessed with the F6’s ability to capture data about exposures and write information to a CF card and to the film itself. So, why would I want a Nikon F? For me the Nikon F represents a certain beginning to modern photography. Since the end of the Kodak APS era I have been a Nikon user and have fully adopted the Nikon culture (not to mention the F-mount lens system). I can’t say that its nostalgia because I wasn’t alive with the Nikon F was released, but there is a desire to touch history and to experience using a fully manual camera, learning to calculate exposure values and becoming more aware of the dynamics of focus selection. I also have some apprehension about approaching a method of photography that has absolutely no electronic assistance or guide, which I have been dependent on since I began photography when I was 5.

    My Nikon F is due to arrive around April 4th.

      Nikon F6 Nikon F
    Exposure Control Manual, Shutter, Aperture, Program Auto Manual
    Aperture Control On-Body Electronic Drive Manual
    Shutter Speeds 1/8000 to 30 min + Bulb 1/1000 to 1” + Bulb
    Power Source CR123 or EN-EL4 Manual
    Auto Focus TTL phase detection, Nikon Multi-CAM 2000 autofocus module Manual
    Film Loading Auto Crank (Manual)
    Film Advance Auto Manual
    Film Rewind Auto Manual
    Multiple Exposure Yes – 2 to 10 Manual
    Self-timer 2, 5, 10, 20 seconds 3-10 seconds (manual gear timer)
    Intervalometer Electronic Program Interval None
    Remote Cable release, ML-3 Wireless Cable release
    Weight 975g (34.4 oz) 1049g (37 oz)
    Released 2004 1959
  • Experimenting with Rollei IR 400

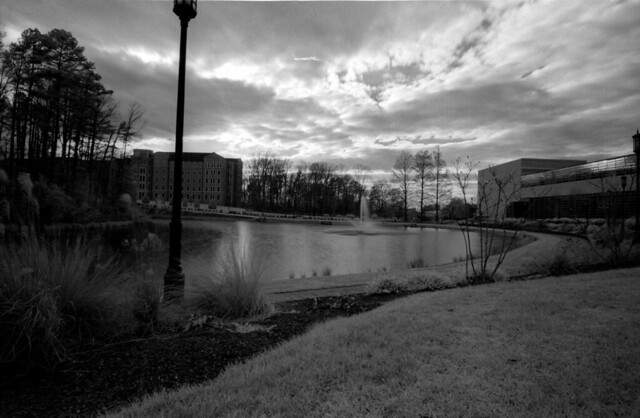
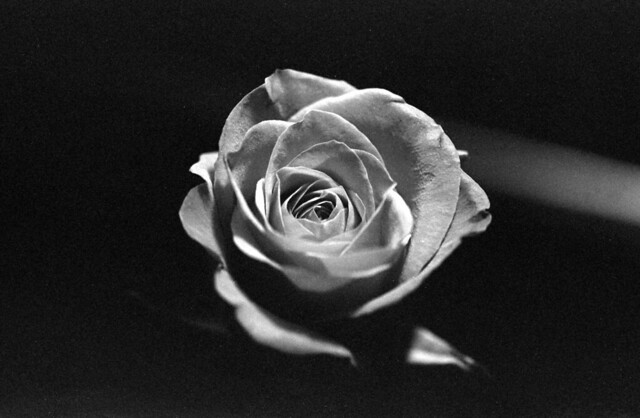
    I have been fascinated by IR photography since I first figured out what it was. I started off as a digital camera brat, so most of my experiences were with really slow shutter speeds on a sensor mostly protected from IR light. Since returning to film I have gotten back into IR and find that it is both frustrating and fun to work with. Until recently my only extended red film has been Ilford’s SFX 200, which is a just barely IR sensitive film (720nm). I have recently discovered Rolleri’s series of films, most of which are more sensitive to red than Ilford’s standard films. Their IR 400 film, which is sensitive to 820nm, has a greater range than anything I’ve worked with before. For my test roll I experimented a lot with exposure settings as IR is very different for metering from visible light. For SFX 200 I have to reduce the metered speed by several stops for a good exposure. IR 400 is not quite as sensitive and seems to require several stops of increase to avoid a dark image.

    R74_E21
    IR 400 with R72 filtration
    R74_E08
    IR 400 with R25 filtration

    Overall I am impressed with some of the results I have gotten with IR 400 on the test roll, but am looking forward to seeing more of the results that I get when I develop my second roll now that I have more of an idea of the type of exposure levels that work well with the film.

  • ExIf 35 – Re-evaluating an Abandoned Project

    I started the ExIf 35 project (http://exif35.pcfire.net) in 2010 when I returned to shooting film. Perhaps I’m metadata obsessed, or just crazy, but I decided I wanted good ExIf data on my scans of film photos. In the six years since I started the project I allowed myself to reach a point where I felt that ExIf 35 was “complete”, it did what it needed to do, usually pretty well. I made no major changes to the software since 2012 (see: http://exif35.pcfire.net/viewnotes.php) and I drifted somewhat away from film photography as a hobby and art again. This spring I purchased a Nikon F6 camera and dove right back in just as deep as I had been before with film photography – the only difference is that the F6 does a bit of its own metadata recording, which makes having a metadata/ExIf workflow even more important. Since the Nikon F6 was released in 2004 many of its accessories (MV-1) are no longer made and its intended software no longer functions in the modern era, so I had to seek out other alternatives and build new things into ExIf 35 to accommodate my needs.  When I speak of “my needs”, I refer of course to the fact that I record information beyond basic ExIf data. I like to record things like photographic filters in use and details about how the film was developed (see: http://exif35.pcfire.net/docs.php?doc=xmpSpec for a complete list of my special fields).

    Yesterday in a fit of boredom between semesters I began looking at some of my data in Exif as it was stored in Flickr. I realized that there was no degree symbol in my develop temperatures (20 C vs. 20° C), so I started tinkering with the data writing process, only to find out that putting that character in one location in the file (Exif:ImageDescription) caused Flickr to corrupt the field when it is displayed. In an effort to correct the problem I began looking at the field in other applications (ACDSee, PhotoMe, etc). I discovered two things 1) There is nothing wrong with the bloody thing and 2) There are a few new ExIf fields that I had not seen before. This led me to the ExIf documentation (http://www.cipa.jp/std/documents/e/DC-008-Translation-2016-E.pdf).

    Many of the fields that were added in 2012 to version 2.3 and in 2016 to version 2.31 are fields related to sensitivity speed and sensitivity type.   Most notably, ISO is no longer the only way to measure sensitivity. While I doubt I will use anything else, this represents a bit of an evolution in the way that metadata capture on imaging devices is represented. The addition of fields such as PhotographicSensitivity, RecommendedExposureIndex and a new ISOSpeed field expand options for the level of detail that is recorded for film sensitivity, although the creators of ExIf intended such fields for describing electronic sensors and their gain ranges – funny how those parallels between digital and film are maintained after all this time. When I first read about those fields my first thought was a very quirky film called Ilford Delta 3200. This film is marketed (recommended, even encouraged in DX) to be ISO 3200.  The actual film speed is ISO 1000. The film is regularly shot anywhere from ISO 800 to ISO 6400 (some claim it can push to 12,800). Once I figure out what each of these fields does in practice (through reading them in a variety of applications) and maybe through reading ISO specification 12232 I will be better prepared to use these fields to accomplish my goals. Some of the new fields relate to details of the camera and lens configuration used – these I am already implementing as they are clearly defined.

    I feel that I need to re-evaluate ExIf 35 because there are a lot of gaps in what it logs to files, what is collected from users and perhaps some difficulties with the way that it writes data in general. I have been away from the project for too long and have only added fields on occasion. The overall functionality of the application needs to be checked for compliance with modern standards as I implemented my ExIf writing in an experimental way, guessing at how things worked and then leaving things in place once they worked, which is perhaps not the best way to approach something as intricate as metadata. There are also fields that I have not tested in detail how they work, which may also introduce problems that cause some applications to not read the file accurately. The addition of new fields such as time zone offset present cases where the UI and the data storage (preferences and defaults) functions need to change to match the expectations of the standards. Adding the new ISO fields I mentioned before will require a change to the handling of recording ISO data, such as I will need new fields in the form to collect the data and will need to establish logic to ensure that all of the data is recorded accurately and consistently even with those fields are not filled out (very often I shoot and develop my standard film, HP5+, at its DX speed, so assuming the other values is fine).

    The project, and its documentation, are long overdue to be refreshed. There are many areas I have patched in new fields or extended functionality without reworking the workflow or the ExIf encoding process.

  • Response to Ken Rockwell’s ‘Why We Love Film’

    I have read Ken Rockwell’s reviews of lenses for years before buying them, and aside from his necessary self-promotion at the end of each review, I’ve found his site quite informative and helpful. Last evening I ran across his post entitled ‘Why We Love Film’ (http://www.kenrockwell.com/tech/why-we-love-film.htm) and found myself approaching the post as a dual-medium shooter (film + digital) and feeling the need to pick apart some of his biases.

    Overall the content of the article is interesting and would be very informative to someone who has never shot film before, but for the truly religious digital shooter, it is offensive and off-putting. Mr. Rockwell directly insults those individuals, so if he was hoping to convert a few people or at least encourage experimentation I think he may be having the opposite effect. The article comes across as a bit nostalgic at the beginning, referencing his 1956 Kodak that ‘does not need batteries’. This does not seem relevant as newer Nikon film cameras will run for a year or more on two batteries. The low power consumption is not universal to film though, as the F5 requires 8 AA batteries. Sure you can just throw them out and replace them, but ultimately in this age we are more likely to put them in a charger and plug them into the wall at night! Its the same thing, just a different medium. Again, Mr. Rockwell seems attached to the nostalgia of a camera that does not require batteries, but yet I fear that even if Nikon’s next Pro D-SLR ran on solar power, he would still not be satisfied on this option. It is not the film medium that Mr. Rockwell is advocating for, but rather a much simpler era in photographic history.

    An area where Mr. Rockwell and I are in complete agreement is the lack of an LCD being a very positive for a photographer’s focus. It is easier to think about the next shot when you aren’t reviewing and in too many cases its too easy to look at the display and doubt yourself.  I think this is more of an issue for amateur photographers and for complete nerds (who would NEVER consider film as a viable medium). I think experienced photographers get over this need to check themselves, especially sports photographers who DO realize that there is no time to waste with image review. Also, Nikon’s D-SLRs have a great option for this – IMAGE REVIEW: OFF.  As for Mr. Rockwell’s safety jab, well, I don’t know what moron crosses the road looking at the screen of their SLR, but it seems today people are in much greater danger with crossing the street with cell phones.  In another article Mr. Rockwell mentions that since he was 10 years old he has been writing down the exposure settings of every frame. In his review of the F6 he mentions that this is taken care of by the camera itself and he can just download the data for storing with his frames, but wait, the Nikon F6 requires… BATTERIES! Mr. Rockwell seems off-put by computers and their ‘time wasting’ capabilities, but that feature of the F6 he loves so much does require a computer, whether you use a Nikon MV-1 adapter or a Meta35 USB device.

    Mr. Rockwell addresses the color range of film. Yes, film range is natively awesome (assuming it is processed correctly and assuming your exposure was perfect), but the key problem with digital cameras is not their lack of range on the sensor, but instead the lack of range provided by the various compression formats. Shooting a Nikon D750 in RAW will give you a single file that is perfectly capable of expressing wide range, it just requires a little work to make it visible electronically (tone mapping primarily). What good is the range of film if the only way to share it with someone is in person? I suppose this calls back to what is the purpose of the medium in general. If photography is to be an intimate expression of lived moments with others who were there, then yes, this makes sense, but if the purpose of photography is to be archival and to be shared, then the limitations of range being expressed only in the original format is lacking in this goal.

    One topic upon which I will not argue with Mr. Rockwell – film grain looks better than digital ‘grain’. Film in its multi-layered emulsion is an organic creation, there is no set pattern of how the grain falls. Film images are cleaner and feel less hazy because they don’t have an unnatural grain as a result of sensor noise. I think eventually digital technology will get there, especially with the improvements in high ISO performance, but will it ever meet the comforting feel of a film grain? I really don’t know.

    Ironically,  despite my critique of Mr. Rockwell’s article, I decided to buy an F6 instead of an F5 because it requires less battery power and will keep details of my shots electronically, freeing me to focus more on the image.
  • Advanced Digital and Pseudo-Digital Film Photography

    Digital photography and film photography are different. This seems like a logical place to start, perhaps too basic, but logical.  For me there are a lot of similarities between digital photography and film as well though because after the analog printing process the negatives are scanned and enter my digital image processing workflow. My digital photos are mostly complete before I can even touch them, the camera does a lot of the work, so it feels good to develop the film myself and know that I have a hand in the process, but there are things that film cannot do. Likewise there are things that digital is not well suited to.

    For me, film is not a color process. As much fun as film developing is, I have no desire to learn the intricacies of C-41 to do things in color. This means that my tool for color has to be digital, and I am actually ok with that, digital is good with color, even if it does attempt to make things overly balanced, even and neat. While film is not so great at color, even for people who have the patience to deal with C-41, it is exceptionally good at delivering great tonal range. Film is also good at reacting to light and being responsive to optical filters applied when a photo is captured. I do enjoy playing with color, which is the reason I have an interest in HDR and tone mapping techniques.

    The past two weeks I have worked on the thoughts I presented in my previous post.  I have been shooting in RAW for digital and working with filters again in film. While thinking through the differences between the two mediums and how I apply them, I did begin to conceive of my film scanner a little differently. Before I was thinking of the film scanner as simply a method to move my analog negatives to a digital format. That simply cannot be the case. All of the documentation on scanning film considers the film scanner as an archival tool for preserving and fixing negatives that have aged. I am working with fresh film, but I still have all of the other tools available as well, so I have begun to think of the film scanner more like a photographic enlarger or other printing equipment in its optical properties. I can vary the brightness, amount to preserve the tonal range and how deep the shadows should be. This means that I have a good amount of control over each image, something that I was not taking advantage of before. From the digital side of things I have begun working with RAW files to allow me to do more work with the color depths, light levels and contrast of the images. One of the fun things I’ve been working with a lot is color subtraction. I have enjoyed removing certain colors from images for the purpose of making other colors stand out and producing a more dramatic image. This is similar to my filter techniques for film which allow me to emphasize certain colors (by filtering their wavelengths, or filtering their opposite).

    I still have a lot to learn with both film and digital, but I feel like I’m gaining an awareness of the capabilities of each medium and I feel like the best thing for me to do as a creative photographer is to continue using both mediums, but to think carefully about the subject matter that is used with each to make the most interesting image.

    DSC_0021R1 ASC_35
    ASC_28 DSC_0008HDR-1c1

    Above are some examples of my work in both mediums. In my opinion the flower is better in digital (top left), where as the boots are more interesting and dramatic in film (bottom right). The flower was shot in both digital and film using a light green filter to reduce the impact of the foliage and emphasize the reds in the blossom (without overpower it). In digital I was able to further suppress the greens and bring out the reds, whereas in film all I was able to do was deepen the reds and slightly reduce the intensity of the green. The film boot photo was captured using an R25 (medium) red filter, the digital was captured without a filter. While I like both images, I find that the texture of the leather shows through more in the film version, which makes the boot appear soft, whereas the digital version shows the leather (of the brown boot) in a more harsh way, making the leather look more waxy and stiff than it appears in reality.

  • An Update to My Developing Process

    Over three years ago when I first dove into film photography and the related development process I wrote an article, The Developing Process. In that time I have adjusted some of the basic techniques a bit and have changed my materials as well.

    Last time was just a list of steps, this is perhaps less useful as a guide to others getting started in film developing, so I will this time begin with materials.


    Materials Needed

    • Developing Tank Kit (Tank, reel, light-proof funnel, lid)
    • Scissors and bottle opener
    • Weighted Film Hangars
    • Beakers (500mL is adequate for a single roll)
    • Mixed developer (I suggest Ilford ID-11 or another high-quality developer)
    • Fixer (I use Ilford’s Rapid Fix Non-Hardening)
    • Stop Bath (optional, but recommended, I use IlfoStop)
    • Wetting Agent (optional, but I use Kodak PhotoFlo)
    • Clock with seconds (or an iOS or Android device loaded with DigitalTruth’s Massive Dev Chart Timer)
    • Thermometer for developer


    The Process

    Step 1:

    • Set up tank (cleaned), reel, bottle opener, film and scissors in light-proof room
    • Turn off the lights
    • Open film canister and gently remove film roll
    • Cut off half-width leader on front of roll
    • Load film on to reel
    • Cut end of film off of the roll
    • Insert reel into tank
    • Insert center column and funnel
    • Lid tank tightly
    • Turn lights back on

    Step 2:

    • Load the developer in the tank. Start developer timer.
    • Determine the developer time by a chart provided by the developer maker or film maker
    • Time the developer based on film type and temperature of the developer bath
    • At end of time, empty developer.
    • Pour in stop bath solution
    • Agitate for about 1 minute
    • Some guides suggest pre-rinsing film, I do not, as it saturates the film and may alter development times.

    Step 3:

    • Pour in fixer (1:4 mix for Illford Rapid)
    • Fix for 5 – 10 minutes, agitate for 10 seconds every minute
    • Empty tank

    Step 4:

    • Wash film for 5-10 minutes by allowing running water to flow into and out of the tank
    • A film washing hose can introduce pressure to the process and ensure a more thorough wash.
    • Mix a drop of wetting agent with enough water for the tank
    • Pour in wetting solution, agitate for 30 seconds, dump.

    Step 5

    • Remove funnel from tank. Remove reel from tank.
    • Pull end of roll free from reel and attach the weighted hangar
    • Gently pull remainder of the roll free from the reel
    • Clamp non-weighted hangar to front of the roll
    • Hang to let dry (usually overnight works well)


    At this point I typically make Chris cut my film into strips of 5, and then I scan them to digital, but more adventurous people are free to make contact sheets or produce enlargements.

    About Reusing Chemicals

    • Most developers discourage reuse, so do I. Use it once, then toss it, its not worth it to have developer you can’t trust
    • Until recently I did not reuse fixer, but now I do. When developing multiple rolls close together (same day or few day period), I will reuse my working-strength fixer.
    • Stop Bath is usually “indicator stop bath”, if its yellow, you are good to go, if it starts to change colors, toss it. It dies with the absorption of developer, but it will let you know when.
    • Wetting Agent – it takes about an eye-dropper of wetting agent per roll. I toss used wetting agent mixtures.


    Notes

    • Most fixers no longer contain “hypo”, and thus, there is no need for a hypo-clearing agent
    • Wetting agent is nice to help the film dry, but film isn’t ruined without it
    • Stop Bath completely stops development, I recommend it for beginners as it gives a measure of safety to the process
    • If using the DigtalTruth Massive Dev chart app, it will walk you through most of the steps, including when to agitate and when to not agitate.
  • Somewhere Between Film and Sensor

    For the past two years a lot of my photography has been in the form of black and white film photography. I accepted film as a challenge: a new medium to explore and learn from. I have come to realize that I have taken film photography as far as I intended to take it and as such it would probably be in my best artistic/creative interest to file it away as a tool and a method, but not as my primary photographic medium.

    I reached this conclusion after looking back over my HDR photos yesterday and realizing that I have missed my other techniques and that I have been too monotonous (through a monochromatic medium even). An issue I now face is how to gracefully re-enter my older digital style, while retaining what I have added to my style through the use of film.

    First of all, I know that I am going to have to slow down my digital pace. Every exposure on film is special, it is recoded on a finite medium that will remain for as long as the medium is able to survive (a long time once properly developed and fixed). Digital is virtually infinite. The images are recorded, transferred and moved about. Each image is special but for an instant until it is quickly replaced by another special or great image. Digital sucks the art out of photography if you let it, it is too perfect, too stable, too reproducible.

    Second, as an extension of a slower pace, I will need to learn to shoot in RAW. Or more importantly, I will have to learn to process in RAW. I am from an era in digital imaging where the JPEG is everything, its how images exist and are transferred, but it is a compressed form that is pre-manufactured… JPEG digital photography is functionally equivalent to shooting with a Polaroid. The camera makes certain decisions and those decisions are committed to the file. RAW is more like having a negative, it can be modified in various ways with various treatments. There is more sensor data available and a wider tonal range to interact with.

    Finally, I need to spend more time with the photographs once I have taken them. This goes along with the previous point somewhat. Its not about getting the perfect exposure or the perfect color on a photo, it is about selecting the correct way to portray the subject, the best way to see something. While it may seem that realism is the way to go in photography, it is very boring and misses one of the key benefits of photography over real life, there are many ways to view something. Manipulating color spaces, adjusting contrasts in those spaces and expanding the tonal range of the images creates new ways to view things. For digital, I cannot allow myself to accept realism as the default state anymore.

    As an extension of these three points of change, I have to start thinking in the physical. With the use of film there is always a physical copy, even if it is in inverse form. I probably should think about producing digital images with the intention of them eventually being printed and being physical pieces of work. It is not enough to have a massive collection of photos stored digitally, in reality that probably is nearly worthless from an artistic perspective. There needs to be a lot of photos, but they have to be individual works, not a collection of point and shoot frames without meaning and without some sense of individuality and personality. 

  • ExIf Necessity

    When it comes to photographic metadata I am obsessive. If an application modifies my ExIf data without telling me, then I am annoyed. This has become increasingly apparent to me recently with some of the tasks that I have attempted to accomplish and their outcome.

    First of all, several weeks ago I attempted to program GPS data handling into ExIf35 so that I could add geodata to my scanned film negatives to include their exposure data and other relevant details. I quickly discovered that to do so would be very complicated and probably not worth my trouble to write due to the poor support for certain types of numbers in Microsoft’s .NET languages. As a result I decided to rely on an old application that I have often used for geotagging my photos, RoboGeo. RoboGeo is a very nice application in that I can add locations from a tracklog, direct from a device or by a variety of manual input methods. I was annoyed when I discovered that by default the application writes its own name to the Software line of the ExIf data. I have no clue what the original interpretation of that particular field was, but in my interpretation it was intended to be used to record the name of the application that last made changes to the geometry or content of the image itself, not just the metadata. That being said, ExIf35 slightly violates that thought because when it writes the metadata it does record itself on the Software line, but I feel differently about that because there is no originating camera data. Luckily I can turn off RoboGeo’s annoying Exif entry and it will leave the metadata intact except for the notes regarding the GPS location that it writes itself.

    The next problem I had regarding Exif recently was in searching for a decent watermarking application for iPad. I tried one application and it worked very well, except that it seemed to remove all metadata from the file (ALL metadata, including created date). I tried another application, the next application didn’t work as well as the first and still eliminated the Exif data. I’m not sure if the programmers of these apps are just lazy or if there is something in the iOS SDK that prevents developers from properly copying the data, but it is rather concerning. I rely on Exif data to provide GPS location of photos, to tell me when they were taken and to give me some idea of shutter speeds and apertures that were used.

    For me a photo without ExIf data is a bit like having only a raw image without its backing identity. Without Exif there is very little that binds the photo to the device that made it or to the creator.

  • Film and Developer from a Novice Perspective

    I have been working with film photography off and on for about 2 years now, since about March 2010. I have used a variety of films and chemicals since the beginning. I am now slowly learning what everything I have been working with does and how each element impacts the outcome of the final image.

    One of the things I have learned most recently is that contrary to the film to digital sensor analogy, noise/grain in images are not entirely the responsibility of the film. It seems that a fine grain film is only as good as the developer it is used with. I was wondering why different film I was processing had similar attributes, apparently it is a result of the developer. Processing Neopan 400 and processing HP5+ should not look very similar, each have their own characteristics, but yet some of the flaws I was running into with one was also occurring with the other.

    I began processing film with a very basic developer that I acquired from Adorama. That was ok for the first roll or two, but I quickly learned that it was much too harsh and didn’t work as well as I would like for making images that could be preserved as components of my artistic portfolio. I then moved to Kodak’s D-76 at the suggestion and urging of many film photographers. I am somewhat happy with the results from D76. It is efficient and produces a moderate size grain on the negative. The problem comes with my needs for enlargement and high-resolution digital storage of the image. D76 is not fine enough for what I’m looking for as I’m often disappointed with the way that my images come out when I look at them at full size. After much reading I have decided to try Ilford’s ID-11. I was tempted to try Perceptol, but it seems a little excessive, being described as a “very fine” grain developer that can easily push process up to 2 steps on all film or 4 steps on Ilford film. Perceptol is an expensive developer which is described in a way that makes it seem overkill for my needs. ID-11 on the other hand seems like it will be a perfect match for Delta 400 as well as HP5+.

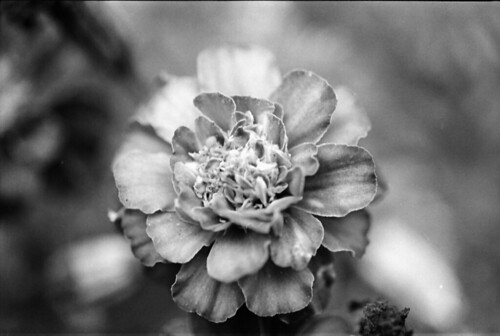
    As for film, I have used several different film: Fujifilm Neopan 400, Ilford HP5+, Kodak Tri-X 125 (ISO 125 film) and now Ilford Delta 400. Each film has different characteristics. Neopan has fairly even toning, but doesn’t seem to reach true white or true black unless processing is either pushed or pulled. Neopan also suffers from large grain which makes the image itself less sharp than it should be given the speed at which they have been shot. The handling of the range is not always that good either as it sometimes seems more sensitive to light spots than to the dark. HP5+ seems to have the opposite problem, it is usually better at handling darks than lights. An interesting thing I have noticed about HP5+ is that its grain is somewhat more pronounced than that of Neopan 400, but yet the grain is less distracting and does not seem to distort the image the way that Neopan does. I also feel like the tonal handling of HP5+ is a little flat. Exposures come out pretty even, but it is almost too balanced, there is a lot of grey and not much black or white. Ilford Delta 400 I have only processed one roll of and I am not really sure what I think of it yet. My first impression is that it does not favor the grey region as much as HP5+ does, nor does it have a favoring of bright spots like Neopan 400. Delta 400 uses black and white pretty uniformly and there are clear white and black regions of the film. Delta 400 also has a very clean grain. It looks almost silky in appearance and seems to handle most things pretty well, including macro photography (which seems to come out badly on most other film).

    Ilford Delta 400 Professional

    Ilford HP5+

    Fujifilm Neopan 400

  • Another reason I love film


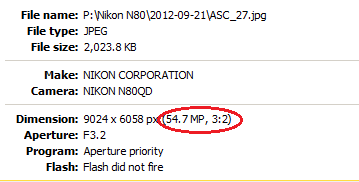
    54.7 Megapixel may be excessive, but it is very nice to have access to that pixel density.