I went to Harris Teeter tonight (at about midnight) to get a ham for dinner tomorrow night. I found myself being annoyed by the expense of the “pre-cooked” 5lb hams, nearly $20 for 1 ham, and it includes a bone. Not exactly what I consider to be a good deal. I was intending to ideally spend about $15 on the ham, and $20 was a little bit more than I was willing to put into 4lbs of meat. Being discouraged by the “fine varieties” I started poking around in the bin to find the less popular hams, the ones that actually require time to cook. I somehow missed the boat entirely on looking at ham and started looking at these “pork shoulder” thingies. I am not a butcher, and while I can tell you about flavor differences of 20 different varieties of apple, I don’t know a butt roast from a shoulder. The preparation methods seemed similar enough, but I still wasn’t sure of what exactly a pork shoulder was. I got the 9lbs monstrosity (that cost me about $15) home, and began checking online for how to cook it, and began freaking out when I discovered a lot of information about using pork shoulder to make pulled pork. While I like BBQ, that isn’t the type of flavor I’m going for with the dinner I’m planning. I am looking for smoky and lightly sweet with a much different texture than BBQ. After my little panic and a little more research I discovered that there are several types of pork shoulder. What I bought, called a Picnic Pork Shoulder is essentially prepared the same way as ham and IS ham, but by a different name. I am still not entirely sure what the differences are, but I have the thing cooking in the oven now for 3 hours (about 20 min/lbs). I plan to let it cool for about an hour when it comes out, and then slice part of it, then chill the entire thing, including a small amount of the fluids for reheating the meat, in case anyone wants it hot (I personally love cold ham). The ham, along with pintos, corn bread and fried potatoes should be a fairly interesting country meal that I hope my guest this evening will enjoy.
An Introduction to Project 365
I have created an introduction to my personal Project 365 to place in the front of the binder in which I am mounting prints of all of my project photos. Here is the (quite lame) introduction I wrote. Its good to know that I have not lost all of my skills of BS that I learned in English Composition II and Creative Writing.
|
September 25, 2009 I am beginning project 365 as a personal project to increase my technical photographic skill as well as to challenge my creative composition skill. The project’s objective is to be a complete body of work of 365 days of photographic effort. Due to the nature of the project the creativity aspect will wax and wane throughout the run of the project, but technical proficiency should remain constant. Executing a project like this encourages continuous interaction with the camera, making its controls an extension of the functionality of the photographer’s optical system. It is also a way for the photographer to work with more advanced techniques that go far beyond the snapshot. Additionally, the project encourages the camera to be with the photographer a larger percentage of the time, making chance photographs of events in action a lot more likely, bringing a bit of the unexpected into the body of the project. The goal of the project is a bit undefined at the beginning. The vague description of being a “complete body of work of 365 days of photographic effort” does not give a lot of detail as to what is being covered. The vagueness is intentional, as it is not possible to predict the route that photography will take over such a long period of time, however, it is expected that towards the conclusion of the project there will be more consistent themes and an overall understanding of what is important, or at least aesthetically significant in the photographer’s life. This exercise is as close to an autobiography as can be constructed in a visual work. The freeform nature of the project ensures that property, even if the photographer tries to escape that trait. Experimentation is a large part of where the advanced techniques are developed. This project is not expected to be a stand-alone portfolio of the photographer’s work. It is a less than polished collection of photographs that are to represent growth and potential. The project will contain successes and failures both technically and compositionally as the photographer advances in skill. In my execution of the project I will endeavor to attempt anything that grabs me, and then work on it. I will place my best failed attempts in the project body, and then if I later have a success, I will place it in the project as well. The motivating factor for all of this experimentation is boredom, it is not possible to have enough ideas and objects immediately available to make 365 days of interesting photographs without experimentation. The project will conclude after 365 days, but the skills learned should outlive the project by a lifetime, and while not a portfolio itself, the body of the project should contain more than enough examples of fine quality work to begin a portfolio.
|
P365: Day 28
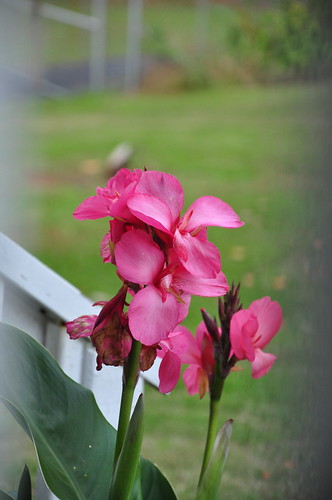
Flower shot through the railing of the deck, the way they are seen through the living room window.
P365: Day 27
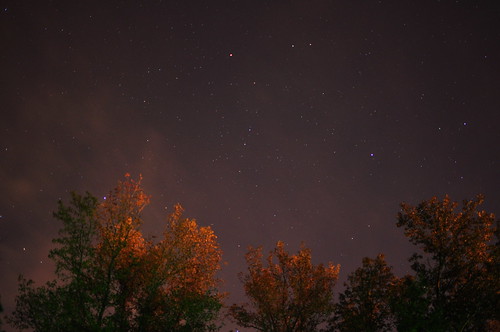
Lately I have been doing a lot of astrophotography, but I don’t often get great color like this. I suspect it is because I went out earlier in the evening this time (about 7:30pm) to get this shot. As one of the comments states, the foreground is blurry, so the stars are in focus. I don’t know why I do that at wide field, I suppose just for technical correctness (since after all, I am attempting to please the astrometry.net blind solver).
Light Unhappiness
A few days ago my new softbox light arrived, I was so happy, I even played with how it worked on the ground, etc. I was a little unhappy because the light wouldn’t screw into a tripod, so I figured, ok, there must be a trick to this, that’s why Adorama was trying to sell me a light stand, so I bought a light stand. Today the light stand arrives and I feel like a monkey with a wrench. I know its useful, I’ve seen others using one and know it can work, but I can’t figure out how to get my light on to the stand. I have tried turning my head, the stand and the light every way I can think of. It took me 10 minutes to realize that the thing that came in the bag with the light is NOT an adapter, but instead a handle. Woohoo me! So now I’m still desperately trying to figure things out, attempting to not have to spend any more money on this particular issue, but I guess if I have to I will, although, usually when I throw money at a problem, I at least know what the solutions are and how they will work, if only in a conceptual way (don’t understand internal combustion that well, but I get that you add gas and you get vroom!). I shall keep monkeying with the light stand and see if I can make magic happen. Grrr… so frustrating, and no one provides freaking manuals.
P365: Day 26
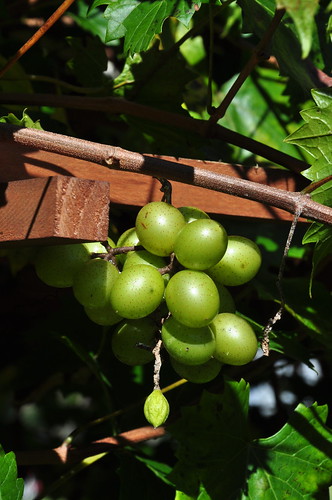
It might be close with the muscadines this year. They may finish before their cold hardiness is put to the test.
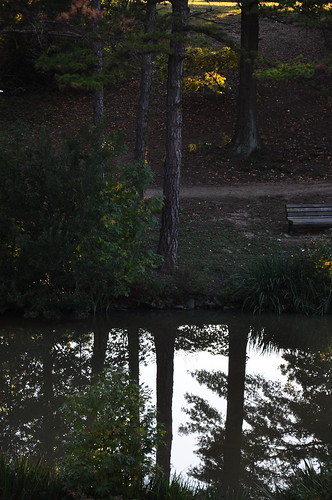
P365: Day 25
The Pleiades

Not the greatest astrophotograph, but its a start. Chris pointed to a blue patch in the sky and asked what it was, I pointed the camera and gave it a shot. Not a long enough exposure to pick up the blue in the Pleiades or the Reflection Nebulae, but I did get the stars themselves. It was very cold outside, so I wasn’t particularly inclined to make too many long exposure attempts at this.
P365: Day 24
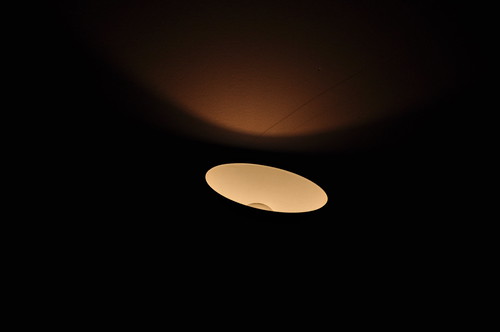
I hate that lately I have been awake mostly at night. I feel so strange when I realize that daylight is gone. This is one of the lamps that illuminates my night and makes things seem a little more bright.
P365: Day 23
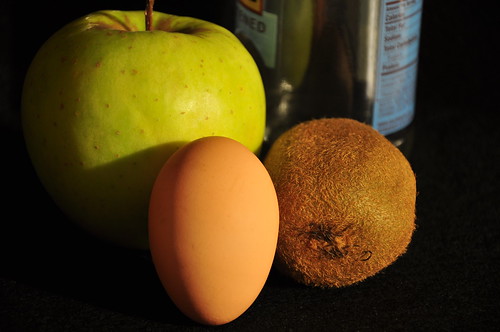
What do these objects have in common? They were laying around the kitchen when I wanted to do a still life.